Wire Wrapped Earrings
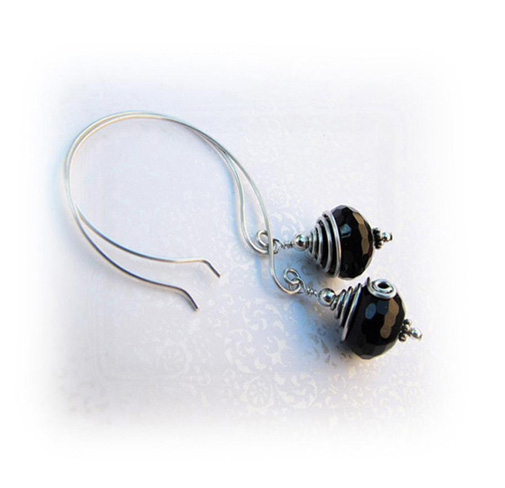
These wire wrapped earrings are fun and easy to make. You will form the cap and the hook on their own and then assemble your earring components together.
Here I am using 20 gauge half hard and dead soft sterling silver wire. It is very malleable and you have to take care not to mar the surface when using it.
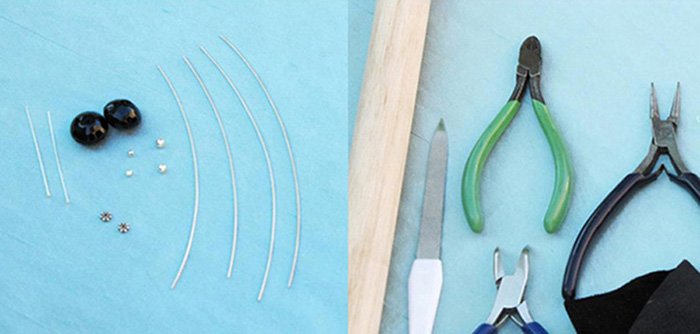
You will need:
Materials
Tools
- 3/4" to 1" dowel
- Round nose pliers
- Bent nose pliers
- Side cutters
- Metal nail file or sandpaper
- A piece of scrap leather or rubber
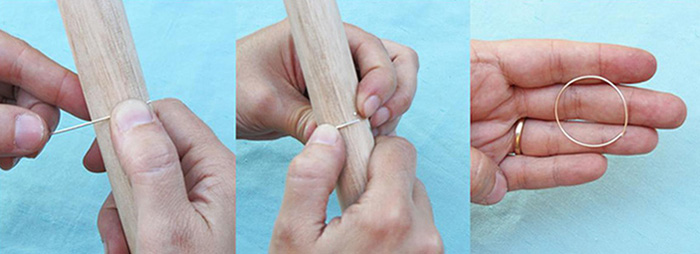
Making Hoop Style Ear Wires
Start by placing the 4" half hard wire on the dowel and make a complete turn until both ends meet. I purchased a small sink plunger for a dollar. It is too cheap to be a good plunger but, when you pop off the rubber end it is the perfect size for a wrapping tool.
With a pair of round nose pliers start to make a loop at one end of your hoop. To make a nice tight loop use the very tip of the pliers. Continue to form a small coil around your loop.
Now, make a small bend at the other end of your ear wires to make the hoops easier to insert and in a downward motion file the edges until they are nice and smooth.
Tip: Metal nail files are a must have for jewelry making. They are easy to use and never wear out.
Making a Coil Cap
Take your 3 1/2" dead soft or soft wire and form a small loop using the tip of your round nose pliers. With a small piece of leather, nylon jaw pliers or a small piece of soft rubber to protect the metal, continue to form a coil around the loop.
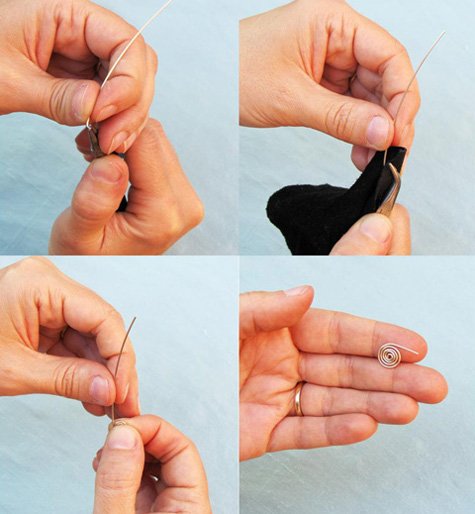
Once you have enough coiled to have a good grip you can continue to form your coil with bare hands. Leave a small 3/8" tail uncoiled.
With round nose pliers form the tail into a small coil in the opposite direction. Then take a pair of bent nose pliers or needle nose pliers and bend your coil downward 90 degrees.
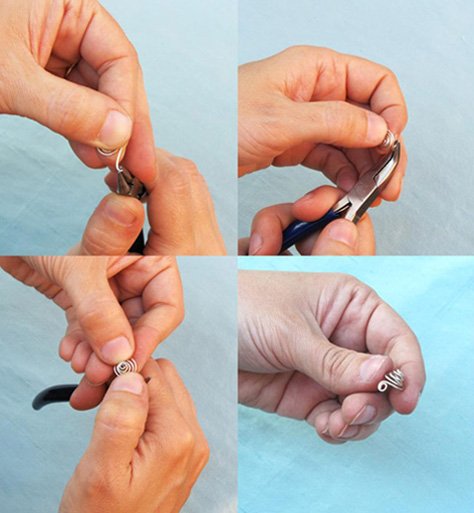
Now, insert your round nose pliers up through the center loop and with your thumbs gently separate the coils downward to form a cap. Now you can begin to assemble your wire wrapped earrings.
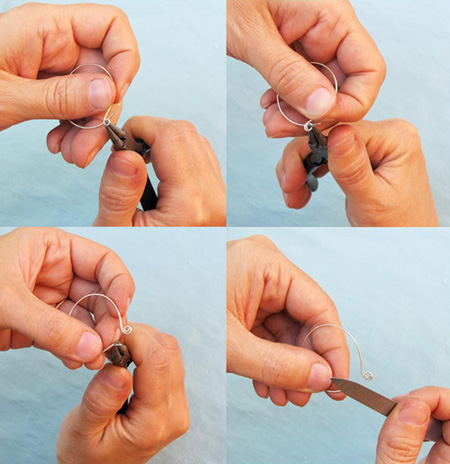
Forming Your Drop
Take your head pin and feed it through the 2mm bead, the 14x10mm rondelle bead, the coil cap and the 3mm bead. Firmly position your cap where you would like it to sit on the bead.
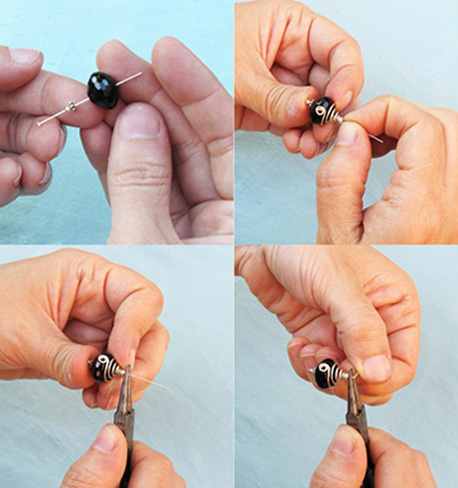
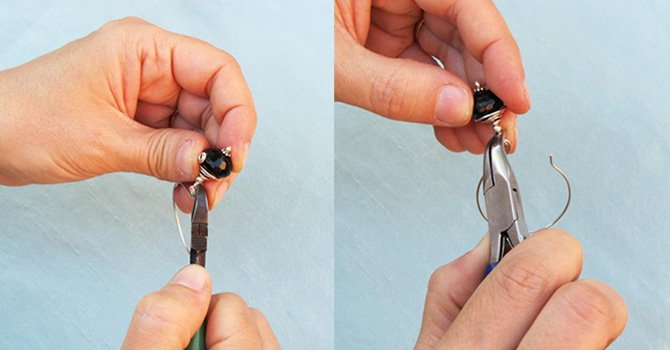
Place your round nose pliers above the 3mm bead and bend the head pin downward to a 90 degree angle.
Bring the end of the pin toward you and start to form a loop around the pliers. Now you can insert your ear wires before you start to wire wrap the loop closed.
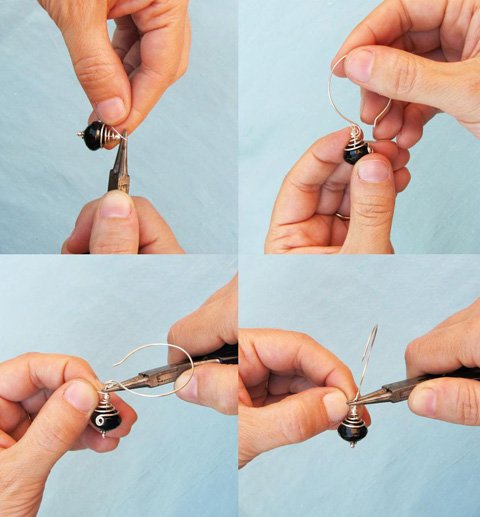
Next, start to wrap the wire horizontally around the pin beneath the loop. Continue to wrap in a spiral pattern until you reach the top of the 3mm bead.
With a pair of side cutters, trim off the excess wire and then pinch it in tightly with bent nose or needle nose pliers.
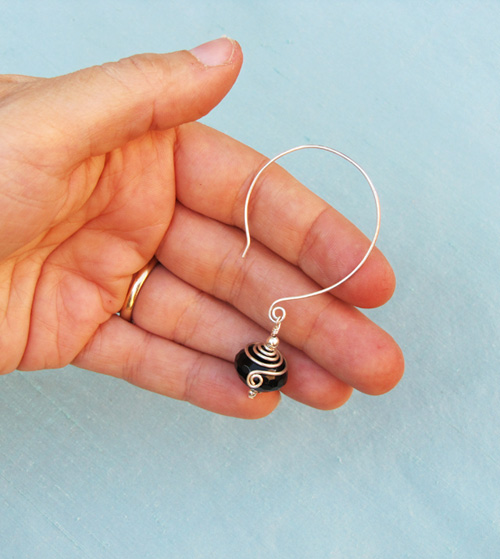
That's it. You have yourself a pair of wire wrapped earrings.
New! Comments
Have your say about what you just read! Leave me a comment in the box below.